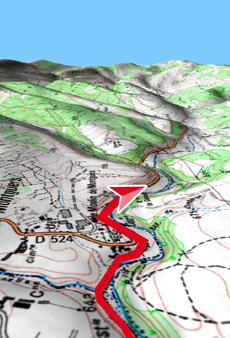
Land may also act as a GPS in your outdoor activities. Land offers you a working mode that allows you to continue working with the software at the same time that you move around, for example in a car with a laptop. All that you need to do is connect your GPS device to the laptop and start analysing your trips in real time with with full of information about your movements.
|
|
|
|
|
|
|
|
|
|
|
WAYPOINT NAVIGATION |
ROUTE NAVIGATION |
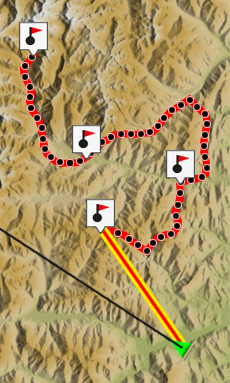
TRACK NAVIGATION |
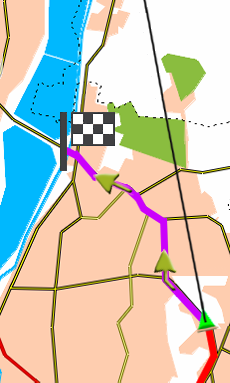
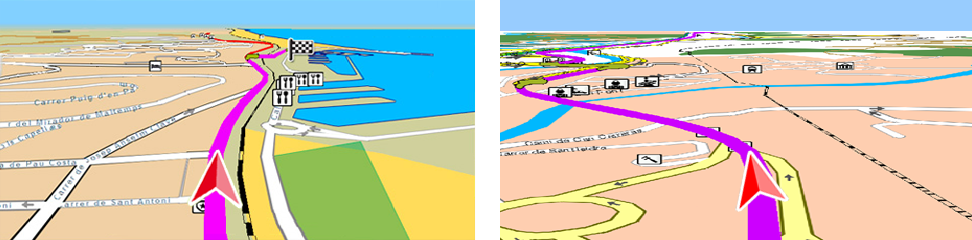
ON-ROAD NAVIGATION |
Navigate an itinerary
In order to start navigating with Land follow these steps:
1. Connect your GPS to the computer.
2. If Land recognizes the device, all the information detected by the GPS will be paired with Land in real time during the whole itinerary.

3. Once detected, press ‘Main menu > Navigation > Activate GPS’ at the tool bar and select your destination:
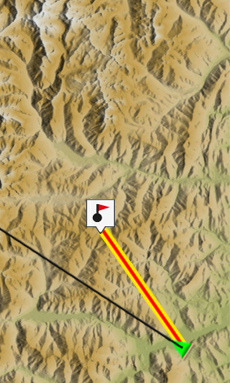
•Navigate towards a waypoint: Select among the current list of loaded waypoints towards which waypoint you want to navigate.
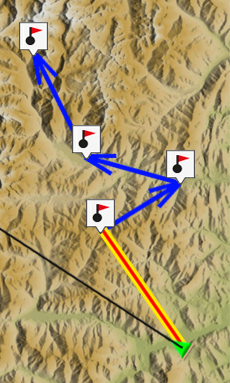
•Navigate towards a route: Select among the current list of loaded routes towards which route you want to navigate.
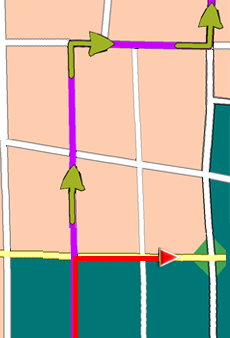
4. You will be told which direction you have to go to reach the waypoint.
5. If you are navigating a route, Land will automatically establish the first waypoint as your destination point. Once you have reached this waypoint, the next one will become your new destination, and so on.
Once the navigation starts, an additional buttons bar will appear. Manage the navigation using the following buttons:

|
|
‘Re-center map’: Viewing screen is re-centerd to your current position. |
|
|
‘Center map in current GPS position’ |
|
|
‘Do not move the map’ |
|
|
‘Show more map in front’: Your current position will be located at the lowest part of the screen so you will see more map ahead of you. |
|
|
‘Center map when it arrives to 10% of the screen border’: Your position will only move 10% away from the centre of the screen because when that happen the map will automatically centre on your current position. |
|
|
‘Orient map’: North up (map is always facing the north) or Track up (map rotates to follow the direction of the track always up). |
|
|
‘Record track’: ‘Triplog’ is the command allowing you to manage the recording of your itinerary. Possible states: recording, paused or stopped. |
|
|
‘Mark waypoint’: Create a new waypoint on your current coordinates. |
|
|
‘Automaps’: Land opens the best map based on your current position automatically. |
|
|
‘Variable ring’: Add more rings around the position. Define the radius of the inner ring and the number of successive rings which will be equidistant from the first inner ring. |
|
|
‘Fixed ring and parallels’: A circumference encircling the position will be drawn. |
|
|
‘View velocity and acceleration vectors’: Three vectors will indicate your speed, your tangential and normal acceleration. |
|
|
‘View turning radius’: A circumference is drawn representing the course that you will follow if you continue with the same turn radius. |
|
|
‘Screenshot’: Create an image file of the current content shown at map window. |
|
|
‘Capture video’: Create a video file of the current content shown at map window. |
|
|
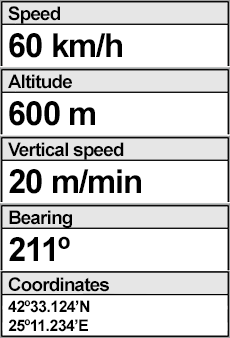
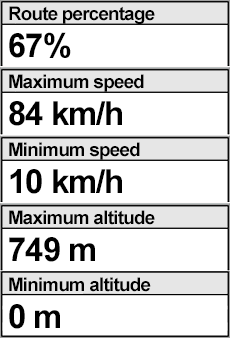
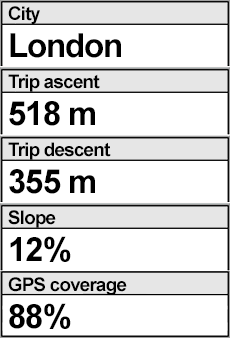
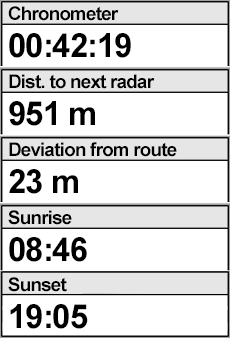
‘View navigation window’: A data page with multiple real-time fields will be displayed. |
|
‘Go to the next waypoint’: When navigating a route you will be heading to the waypoint located after the one you were going to. | |
|
‘Go to the previous waypoint’: When navigating a route you will be heading to the waypoint located before the one you were going to. |
|
|
|
|
|
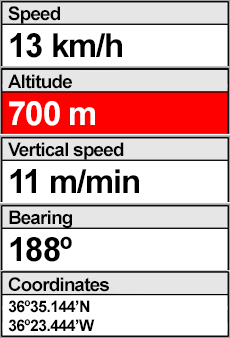
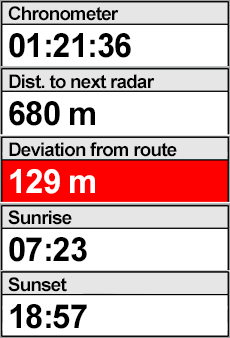
Data page offers you an additional space where a larger number of data fields are displayed. When opening a contextual menu on a data field, you will find the available functions associated to that field. Data pages can be configured to fit your preferences, customize Land displaying the data fields that you really need.
NOTE: You can also change just one field by opening the contextual menu on it (select ‘Fields selection’).
IMPORTANT: Get to know more about data fields in Appendix.
Program alarm warnings
During your navigation, Land may alert you when exceeding certain limits defined by you. For example, you can program an alarm to ring when you reach 100 km/h, or when you reach 200 m of altitude.
|
|
|
|
|
Follow these steps to set your own alarms before you start navigating:
1. At navigation window, open the contextual menu on the data field that you want to associate the alarm to (for example: speed).
2. Select ‘Program an alarm’ and set a maximum or/and a minimum value for each field. In case you do not fix any value, the alarm will be deactivated with no effects during the navigation.
3. Fix also a warning sound and a repetition interval.
Alarm warnings will be automatically displayed during the navigation on data fields according to the preferences that you previously set.
•Alarm warning in red: If you are exceeding the maximum or minimum value.
Configure additional settings of the alarms from ‘Main menu > File > Options > Navigation > Waypoint alarm’.