Basic operations that can be perfomed on tracks:
•Open a track:
|
|
|
|
1. On the buttons bar, press ‘Open’.
2. Select the track that you want to open.
3. Once opened, track will be displayed at map window and listed at the data tree.
•Show a list of all opened tracks: This window shows you a list containing all the tracks that are currently opened on Land. From this window you can carry out several actions on tracks.
|
|
|
|
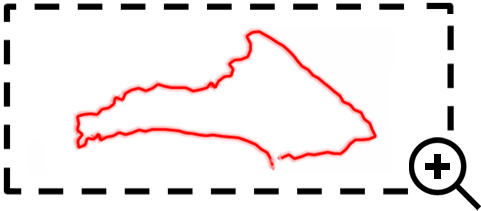
•Zoom to a specific track: Focus the selected track at map window in just a click.
•Show a list of all the track points contained in a single track: This window shows you a list containing all the points that make up the selected track. From this window you can carry out several actions on track points.
|
|
|
|
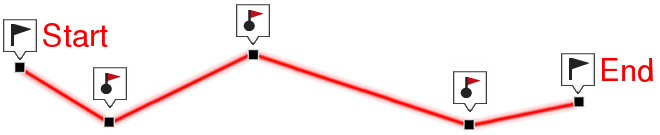
•Create a new track point by point:
|
|
1. At map window, open the contextual menu at the exact location where you want to create the reference.
2. Select ‘New > Start track here’. The first track point will created in that position.
3. Fill in the basic information of the track.
4. Select the location of the second track point and repeat this action up to the last point.
5. Once finished press ‘Close edition’.
•Create a new track dragging the mouse:
|
|
|
|
1. At map window, open the contextual menu at the exact location where you want to create the reference.
2. Select ‘New > Start track here’. The first track point will created in that position.
|
|
|
|
3. At the vectorial editor, press ‘Draw track by dragging the mouse’. Now hold down the left-hand button of the mouse and move it while you draw the track (free hand draw).
4. Once finished press ‘Close edition’.
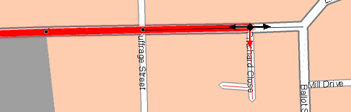
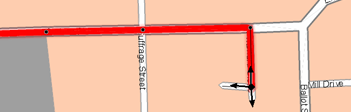
•Create a new track using a road map:
|
| |
|
|
|
2. Select ‘New > Start track here’. The first track point will created in that position.
|
|
|
|
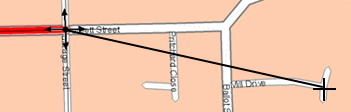
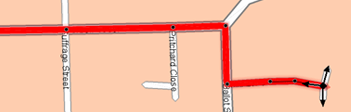
3. At the vectorial editor, press ‘FastTrack’. Arrows will be displayed on each intersection, each arrow indicates a different way to go, choose the path to take on each intersection.
|
| |
|
|
|
4. Repeat the same action on every intersection until you reach destination.
You can also draw the whole track at once by pressing ‘Control’ at the same time that you select your destination. By doing this, Land will calculate the fastest route and generate the whole track from your current position up to the destination at once.
5. Once finished press ‘Close edition’.
IMPORTANT: To perform this action you must use a vectorial map (*.VMAP)
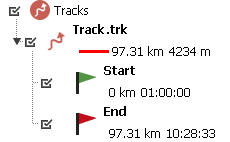
•View a graph representation of a track:
|
|
|
|
|
|
|
|
Display a graph representation of your track. These are the available functions on graphs.
•Guiding Y axis: Bar serving as moving axis.
•Change data fields on the X/Y axis: Click the axis that you want to change and select the data field from a list of available data fields to choose from.
•Moving graph: Use ‘Zoom’ buttons to sections of the graph with more detailed precision (graph scrolling can also be applied by dragging the graph up and down as well as laterally).
•Window zoom: Set the proportion of the zoom window to zoom in
•Automatic re-center: Press ‘Re-center’ button to automatically recenter the graph.
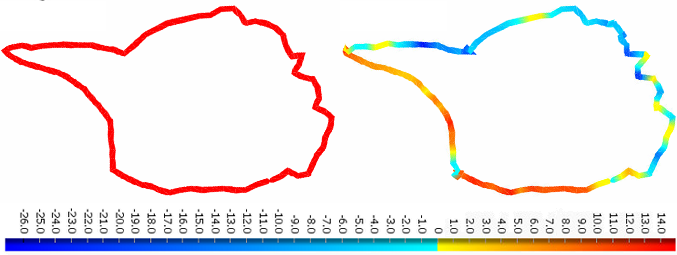
•Gradate the color of a track: Show the variation of a selected data field across the itinerary, for example, the altitude value for each of the track points.
|
|
|
|
•Save a track:
|
|
1. On the data tree, select the track that you want to save.
2. Open the contextual menu on the track and press ‘File > Save track’.
•Send & Share: Depending on the selected element, Land offers you the possibility to send or share the track in which you are working in to several destinations in just a click:
•To connected devices (GPS, smartphones...)
•To internet servers (Dropbox, GPX-View, GPSies, EveryTrail…)
•To any of the folders of your computer
•By e-mail