Thanks to Land you are able to complement your maps downloaded from internet with your old paper maps.
Map calibration
Scanning a map can often be a long and tiresome task, follow these steps to guide you throughout the process:
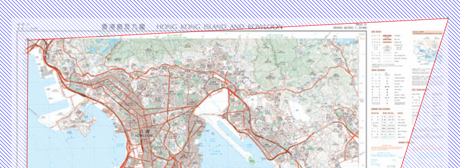
1. First of all, you need to scan your paper map. The size of old paper maps usually implies that you have to scan them bit by bit or ask for professional help.
|
|
|
2. Once scanned, your map becomes digital and ready-to-calibrate with Land. Press ‘Main menu > Maps > Calibrate image’ (Land not only offers you the possiblity to calibrate maps, but also images).
3. Select the map you want to calibrate, Land allows you to work with these formats:
|
|
|
|
NOTE: If you have scanned your paper maps in another format, use an image editor to convert them to any of these accepted formats.
4. Calibration editor will be launched. Fill all the information required at ‘Projection’:
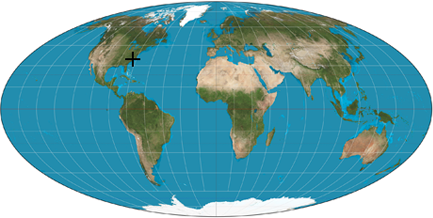
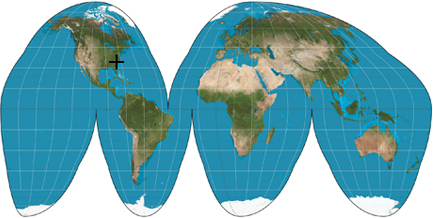
•Projection: All maps are approximate representations of the surface of the earth on a flat surface. The creation of any map uses a method that associates each point on the earth’s surface with a point drawn on a map. Different types of cartographic systems are used to make this association. There are several different types of cartographic projection that are classified depending on the areas they cover. Choose the most suitable projection for the map that you are working with:
|
| |||
|
|
| ||
|
| |||
|
UTM |
Lat./Lon. |
Mercator | |
|
Albers |
BGN |
Lambert | |
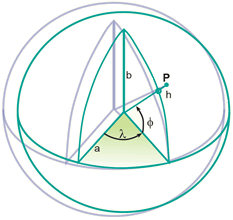
•Datum: Datums are used to translate the positions of elements (waypoints/routes) to the exact position on the earth. Datum systems are needed because the earth is an imperfect ellipsoid. Choose the most suitable datum for the map that you are working with:
|
| ||
|
|
Datum A |
NAD83 |
|
Datum B |
ED50 | |
|
WGS84 |
NAD27 | |
|
OSGB36 |
PSAD56 | |
NOTE: If you do not know the projection of your map, set ‘Automatic’. Land will use UTM, the most extensively used projection in the world.
5. At ‘Corners’ remove the legend of your map, this operation is usually done to eliminate the frame that surrounds the map so that it can fit perfectly alongside with the rest of the maps. When working with Land, is highly recommended that the maps do not contain map legends around them because kind of frames break up the continuity of the orography. Re-define the area of the map having in mind that map will be highlighted while the marked area will be erased.
|
|
|
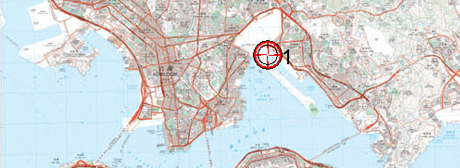
6. When you calibrate a map you are actually positioning a picture on the surface of the earth. In order to do this, you must know the exact coordinates of at least two points of the map. At ‘Point 1’, type the information related to first calibration point.
•Bitmap coordinates: Select a point on the map as reference.
•Coordinates type: Type the exact coordinates of the point that you just marked on the picture.
If you don’t know the coordinates of that point, move the previous point from one location to another or even delete it. Remember that you can also use a waypoint as a calibration point.
|
|
|
|
|
|
|
X: 308.0 Y: 154.0 |
LAT: 22°19'18.2"N LON: 114°12'02.2"E |
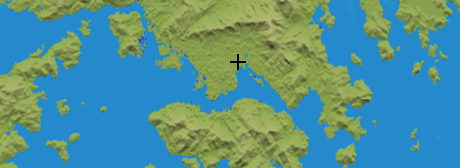
7. Repeat the same procedure for the second calibration point at ‘Point 2’. This will allow Land to join together the information given by bitmap (map) together with the system of coordinates of the sofware and locate the exact position of the map.
|
|
|
8. It is highly recommended to use a minimum of three calibration points in order to obtain an accurate calibration of the map. To include more calibration points click ‘Create an additional point’.
9. Assign a name for the newly calibrated map and save it.
10. Once stored, map will be calibrated and ready-to-use.
If you superpose a waypoint, a route or a track onto a calibrated map, and you notice that these references are out of placed or a bit moved, is quite possible that the calibration of the map has not been carried out properly.
|
|
|
|
|
|
|
Y: 0 m |
X: +1000 m Y: -500 m |
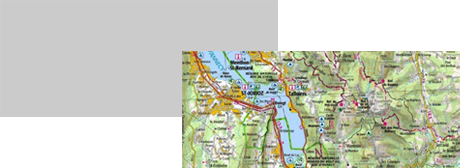
In this situation, there is no need to scan the map and repeat the whole process again:
1. At map window, open the contextual menu at the map you want to move.
2. Select ‘Move map calibration’ and write the variation of X (abscissas) and Y (ordinates) to adjust the new location of the map.
Calibration review
If you superpose a waypoint, a route or a track onto a calibrated map, and you notice that these references are out of placed or a bit moved, is quite possible that the calibration of the map has not been carried out properly.
In this situation, there is no need to scan the map and repeat the whole process again. Press ‘Review map calibration’ and check that all the information. It is highly recommended to remove the old calibration points and locate new points. Adding new calibration points while keeping the old ones will not solve the problem because the old points may not be correct.