Basic operations that can be perfomed on waypoints:
•Open a waypoints file:
|
|
|
|
1. On the data tree, open the contextual menu at the category ‘Waypoints’.
2. Select ‘Open waypoints file.
3. Once opened, waypoints will be displayed at map window and listed at the data tree.
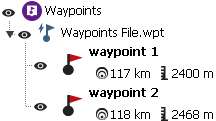
•Show a list of all the waypoints contained in a single waypoint file: This window shows you a list containing all the points that make up the selected waypoint file. From this window you can carry out several actions on waypoints.
|
|
|
|
1. On the data tree, select the waypoints file you want to consult.
2. Select 'Waypoints list'.
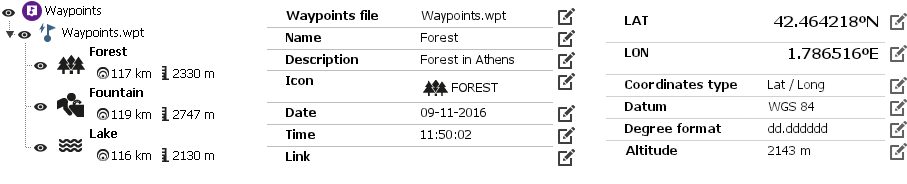
•Check the properties of a waypoints file or a waypoint: This window shows you a list of properties of the selected waypoints file or waypoint (some parameters are editable).
|
|
|
|
1. On the data tree, select the waypoints file or the waypoint you want to consult.
2. Select 'Properties'.
•Zoom to a specific waypoint: Focus the selected waypoint at map window in just a click.
|
|
|
|
1. At the data tree, open the contextual menu on the waypoint.
2. Select 'Zoom to it'.
|
|
1. On the data tree, open the contextual menu at the category ‘Waypoints’.
2. Select ‘New waypoints file’.
3. The new file will be labled as Active Waypoints File (AWF). New waypoints will be always saved inside the Active Waypoints File (AWF).
•Create a new waypoint:
|
|
|
|
1. At the button bar, click the 'New waypoint' button.
2. A pop up window will be displayed, fill in basic data for the waypoint you are about to mark: name, waypoint icon...
3. Move the pointer over the map and decide the exact location where the new waypoint will be marked.
•Save a waypoints file:
|
|
|
|
1. On the data tree, select the waypoint file that you want to save.
2. Open the contextual menu on the waypoints file and press ‘File > Save waypoints file’.
•Send to: Land offers you the possibility to transfer any waypoint file to several destinations (e-mail, Dropbox, GPS, smartphone...):
1. Open the contextual menu on the item you want to transfer.
2. Once open, press 'Send to' and choose where you want to transfer the selected item. If you owe a new generation TwoNav GPS, you will be able to choose between transferring via USB cable or Wi-Fi.
3. File transfer will start and may take a few seconds.
IMPORTANT: Transfer options may vary depending on the selected item.