Functions accessible from: 'Main menu > Settings > Activity profiles > Data pages'
|
|
|
|
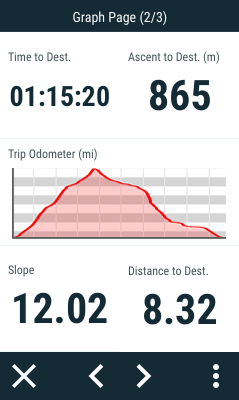
As you travel, the device will record all kinds of information in real time (speed, pace, altitude, distance, gradient....). These values are called data fields and are grouped into data pages. Since the relevant data differ depending on the sport (hiking, running, road bike, mountain bike). Remember that you can change the data fields and replace them with others that are better suited to your needs. Customise your device by displaying only the fields that you really need, or create completely new data pages.
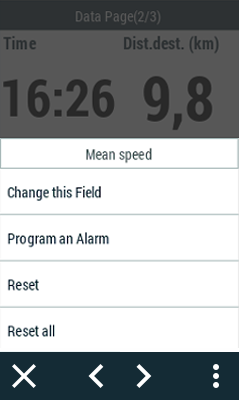
Changing a specific data field
You can change a specific data field directly from the data page:
1. Open the data page containing the field you want to replace.
2. Open the context menu for the field you want to change and select ‘Change this field’.
3. Select the new field to replace it.
Editing an existing data page
To edit any of the data pages follow these steps:
1. Go to ‘Main menu > Settings > Activity profiles > Data pages’.
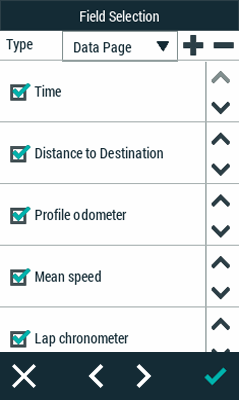
2. In the ‘Type’ option, select the data page you wish to modify.
3. The fields at the top (squares checked) are the fields that are displayed on the data page. Uncheck the square to hide its associated field.
4. At the bottom are the available data fields, sorted by category (distances, altitudes, times, etc.). Look for the field you want to add and check its square to add it to the data page.
5. You can also rearrange the order in which the fields are shown on the page by using the arrows on the side.
Creating a new data page
If the arrangement of default data pages does not suit your needs, you can create your own pages by following these steps:
1. Go to ‘Main menu > Settings > Activity profiles > Data pages’.
2. Press ‘+’ to create a new data page (you can also delete any of the current pages by pressing ‘-’).
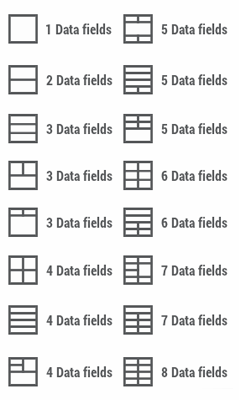
3. Give the new page a name and choose a template to define how the data will be arranged.
4. Then, simply add the fields that will make up your page.
5. The fields at the top (squares checked) are the fields that will be displayed on the data page. Uncheck the square to hide its associated field.
6. At the bottom are the available data fields, sorted by category (distances, altitudes, times...). Look for the field you want to add and check its square to add it to the data page.
7. You can also rearrange the order in which the fields are shown on the page using the arrows on the side.
IMPORTANT: For useful tips on using each data field, see the Appendix.